To compensate for awkwardly placed fingers, adjust the angle of the top bars if the lathe does lack a proper tool rest. You can glide your fingers back and forth with many tool rests that have flat spots. Some are adjustable and will fit most lathes. Other rests can be adjusted for different heights. There are several important aspects to be aware of when choosing a toolrest for your lat.
Light source
If you're not familiar with the concept of a light source for a tool rest for a lathe, you're not alone. Many lathes have overhead lighting and fixtures attached to the ceiling. These lights offer additional lighting, but can block operator access. For larger lathes, a tool rest with an integrated light source is the best option.
A tool rest is a combination of a horizontal and vertical arm. On the tool arm's front side, mount a light source. Preferably an LED illumination strip. The strip is attached to an electrical power source by means of a wire 20. Alternative options include a tool rest that doesn't require a light source. This invention will allow the creation of a better tool rest for lathes that incorporate a light source.
Support element
Support element to tool rest for lathe solves many problems related unexpected movement of toolrest. In the prior art, the support element for the toolrest is a point-to–point abutting arrangement. Because the toolrest must bear torque and axial force during tooling, the friction force generated is not adequate to support the toolrest. This design presents safety concerns. The support element for tool rest on lathe is used to protect the toolrest against torque and axial pressure generated during tooling.
A toolrest for a lathe usually includes an up-standing metal bar. The bar provides restraint and may have grooves or a sleeve for locating the tool. Some models include a handle to help you turn the tool. These toolrests can be either metal or wood. Wooden toolrests should be smoothed. A support element for a tool rest for lathe can be purchased separately.
Adaptive device
Adaptive device 100 comprises an externally cylindrical sleeve having a head and a threaded section, and a threaded portion 274 on the outer edge adjacent an end opening 150. A flat surface 160 is formed by the milled shoulder 140 to accept set screws in the latheholder 310. The set screws370 press against flat surface 160 to keep the adaptive device positioned within the lathe.
The Mortimer pin rest claims a gated function, but the support bar rides virtually parallel to the tool shaft, so it should provide sufficient levering ability sideways. This device has a very large gate, which almost certainly suffers cam locking. While this is an improvement over a standard tool rest, it offers few advantages in terms of fine tool control and motion restriction. This is not a good option for those who need full tool control without compromising precision.
Cutting tool
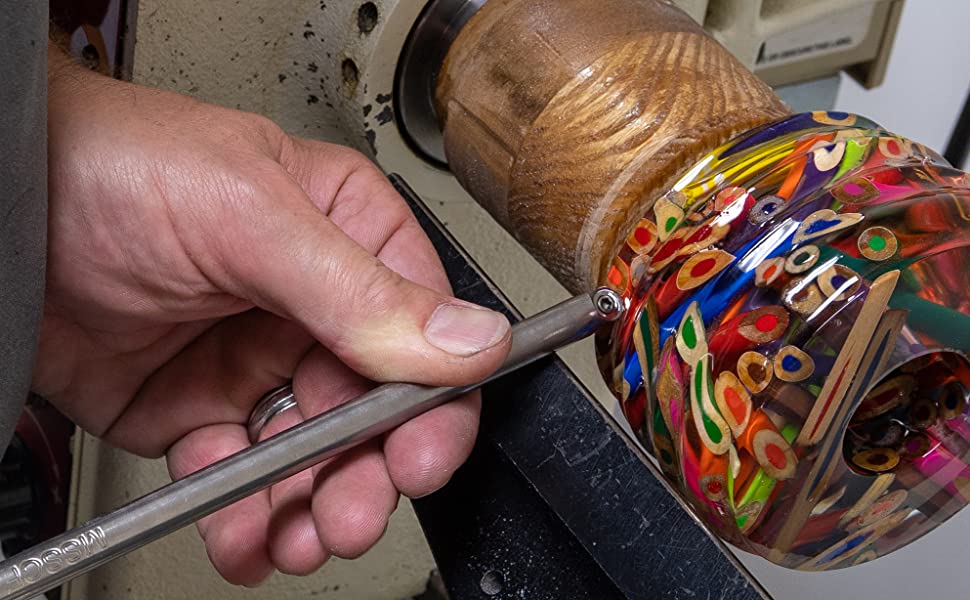
The first thing to do if you are new at lathe work is to purchase a cutting tools rest for your lathe. This accessory will allow your tool to rotate as close as possible to the wood by supporting it. The toolrest's body slopes backwards from the forward edge. This allows you to position your cutting tool at an optimal angle for efficient cutting. You can smoothen the surface of your cutting tool rest by using a file.

If you are looking for a cutting-tool rest for your lathe make sure it has flat spots. This will prevent your fingers from rubbing against the surface. This tool rest prevents your hands from sliding off the cutting instrument. It is also useful for keeping the workpiece stable during high-speed turning. There are many sizes that will fit your lathe. A professional can help you choose the right size for your lathe.
FAQ
How do I identify the type of wood that I am dealing with?
Always verify the label on wood purchases. The label should detail the wood species, its moisture content and whether it has been treated or not.
What is the main difference between plywood or particle board?
Plywood is made up of layers of wood pressed together under pressure. Plywood can come in many thicknesses and is used for flooring and cabinets. Particle board is made from sawdust mixed with resin and then compressed into large blocks. It's often used for home renovation projects. Both types of boards are durable and easy to cut.
What's the difference?
Hobbyists are passionate about making things from wood, while professionals tend to be more focused on the quality and craftsmanship of their work. Hobbyists are proud of their creations and will often share them with family members and friends. Professionals will spend hours researching designs before they begin working on a project. Professionals will be meticulous about all aspects of their work, from selecting the right materials to finishing it.
Does it take a genius to make woodworking work?
No. Woodworking is not rocket science. Anyone can learn to use basic powertools and techniques to create beautiful work of art.
How do I learn basic woodworking skills?
It is an excellent way to learn how to build furniture. You can make a simple bench yourself. This project can be completed with whatever wood you have available at home. If you don't know what kind of wood to use, then go ahead and buy some cheap pine boards from Home Depot or Lowes. After you've constructed your bench you'll want sand all the rough edges off and varnish it.
What kind wood should I use for my project?
Oak, maple, cherry and mahogany are the most common wood types used for woodworking. Each type of wood has its own unique characteristics that can affect the final product's appearance. For example, oak tends to be darker and harder than other woods. Birch is lightweight and soft while mahogany is heavier and denser. You can also choose between solid wood and veneers. Veneers are thin sheets or wood that are glued together into one layer.
Statistics
- Average lumber prices rose about 600 percent between April 2020 and May 2021. (familyhandyman.com)
- Woodworkers on the lower end of that spectrum, the bottom 10% to be exact, make roughly $24,000 a year, while the top 10% makes $108,000. (zippia.com)
- Most woodworkers agree that lumber moisture needs to be under 10% for building furniture. (woodandshop.com)
- In 2014, there were just over 237,000 jobs for all woodworkers, with other wood product manufacturing employing 23 percent; wood kitchen cabinets and countertop manufacturing employing 21 percent. (theartcareerproject.com)
External Links
How To
Tips on how to drive a nail in wood
First, choose the right size and type of tool to drive a nail through wood. Claw hammers include mallets, claw hammers (sledgehammers), mallets, ball-peen hammers, hatchets, and mallets. Each type of hammer comes with its advantages and disadvantages. A claw hammer, for example, is the best choice if you need to hit nails hard. However, it's not easy to know exactly where the impact will land. A sledgehammer allows you to hit large areas simultaneously, but it is too heavy and cumbersome to use for small tasks.
Place your hand flat on the side of your chosen hammer so that the handle rests in your palm. Take the handle and hold it with both hands. But don't press down so hard you injure yourself. Your wrist should be relaxed while you hold the hammer straight upwards. Next, swing the hammer toward the ground and aim for the nail's center. You should feel the impact of the hammer striking the nail. Practice swinging your hammer on a block of wooden until you feel comfortable.
The hammer should be held close to your body when you are ready to begin driving the nail. To ensure that the nail is perpendicular on the surface of the wooden floor, position it. Keep your eyes on the tip. Then, swing the hammer forward. Next, follow the motion of your hammerhead. Repeat this action several times, gradually increasing the speed of the swing. Once you have mastered this technique, increase the power of your swings. Try holding the hammer above your shoulder and bring it down forcefully. You'll have more energy to work with.
After you have nailed the hole, take the hammer off the nail. The rest of the nails can be pulled out using a screwdriver, pry bar, or a hammer. Keep the nail heads parallel to the board's surfaces in order to avoid splitting wood.