
A trimming router is a miniature router that can be used for various tasks, including edge trimming. These routers can be used to drill holes and create signs. However, they may only be able to accept bits that are smaller than their baseplate. A router bit that is larger than the baseplate may not work in such cases. This article will give you an overview of the different uses for a trimmer router. You will be able choose the right router for you if you have read this article.
Trim routers, which are miniature versions regular routers, can be used to make small adjustments.
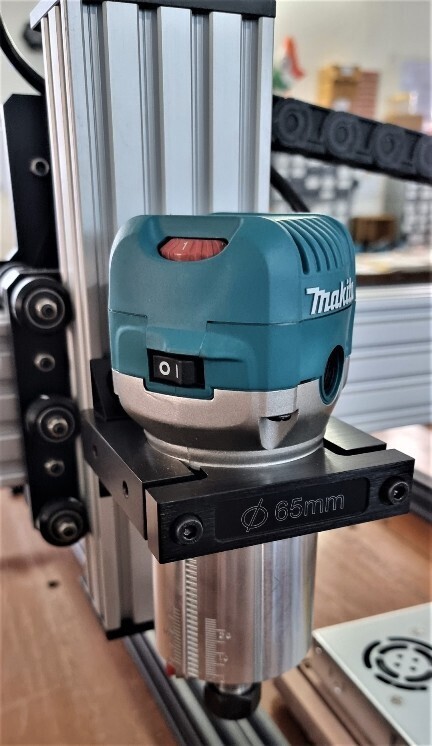
There are two types, straight and plunge, of trim routers. Both are useful for light duty work. But, the plunge routers are lighter than trim routers. It requires two hands and is heavier. The motor of the plunger router is powerful enough to maneuver through heavier materials. The plunge router's motor is larger and more powerful than trim routers. Plunge routers can be more difficult to use than trim routers, so they are usually more expensive.
They can handle small profiles for edge trimming
There are two main types of trim bits: double and single rounding. Double rounding over bits creates a smaller profile. Single rounding over bits cuts the top and bottom edges simultaneously. Double rounding over bits gives the project a decorative edge, while single rounding over bits keeps the project's finish. Double rounding bits can be more costly than single rounding them over, but you need to make sure that the one you select is right for you.
They can be used in drilling holes
They are small in footprint making them suitable for narrow aprons and small box sides. The router comes with a cutting edge and a solid-carbide bit for polishing. They can also drill holes. A simple method of drilling a hole in a veneer surface is to use a template to drill a pin in the workpiece. You can use the router's 1/4 inch up-cutting spiral blade to drill a hole if you don't have a template.
They can be used as signs
You can create your own signage using many different materials. You can use different types of paper to create your signage. For example, you can use glossy photo paper to create a sign with a professional look. Photo paper is versatile and can be used to print different kinds of photos. It is also able to adhere to various surfaces, so it is not as difficult as you may think to use this material for your signage. Be careful with the material you choose because it can warp under extreme temperatures.
They can be used to make mortises
Woodworking routers can be useful for making mortises. This tool offers many functions such as making mortises, turning tenons, or other types cut. By using a template, you can create any shape you desire with this tool. A piece of furniture might have rounded corners at the top and bottom, ornamental cuts on the bottom and an inverted "D” shape at the top. You can make a straight line from the top to the bottom and short, curved sections at both ends of your "D" shape.
They can also be used to make grooves
Routers, which are handheld machines that use an instrument to cut grooves, are called routers. There are many different types of router bits that can be used to cut grooves. You can purchase router bits individually or in sets at hardware shops. The menu at the top allows users to choose from the various options. These are the most common ways you can use a router.

These can be used as chamfers
Chamfers create beveled surfaces by adding or subtracting flat sections along the edges of shapes. This process can be used on one or multiple edges. First, select the edge you want to chamfer and then specify the offset distance. The distance and angle between the edges can be specified in SolidFace. SolidFace gives you the option to chamfer a shape's edges by pointing towards a reference point, straight line, or to another shape. You can then preview the chamfer that is created before you start machining the part.
They can be used in trimming laminate edges
To trim the edges of laminate boards, you can use PVA glue (or a suitable contact adhesive). You can remove old glue residue with rubbing alcohol, or a damp paper towel. Then, apply the new glue to the laminate board using long, smooth strokes. Let the glue harden for 20 minutes to form beads. Then, carefully lift the laminate onto its new place. Repeat the procedure if necessary.
FAQ
Is it possible to open my own woodworking shop?
It is not easy to start a woodworking business. There are lots of legal requirements and regulations that you'll need to follow. This doesn't necessarily mean that you should go through all the work of setting up a company. Many people opt to join existing businesses instead. This will allow you to avoid paying membership fees and taxes.
How long does it usually take to complete a piece furniture?
It depends on the type of wood you choose, the complexity of the design, and the amount of finishing you apply. Hardwoods, for example, require more maintenance than softwoods. Hardwoods are also more expensive than softwoods. However, they are stronger and more resistant to moisture. The average time it takes to finish furniture is one week to three weeks.
How can I determine which tools are most suitable for me?
When shopping for tools, it helps to think about your needs and preferences. Do you prefer metal handles or plastic? What size screws and nails do you use most often? Are you more comfortable using power tools than hand tools?
What else should I know about woodworking in general?
Furniture making is a laborious task. It's easy not to appreciate how hard it is. Finding the right type of wood is the most difficult aspect of this process. There are so many options for wood, it can be difficult choosing the right one.
A problem is that wood doesn't have the same properties. Woods can warp, split, or crack over time. Before purchasing wood, you should consider these factors.
What is the difference between a hobbyist woodworker and a professional woodworker.
Hobbyists are passionate about making things from wood, while professionals tend to be more focused on the quality and craftsmanship of their work. Hobbyists tend to take pride and share their creations with family and friends. Before they start working on a project, professionals will spend hours researching the designs. They'll pay great attention to details, from choosing the most suitable materials to finishing the work perfectly.
What type of tools does a carpenter use?
Carpenters use a hammer as their most common tool. A hammer is used for pounding nails into wood. This helps to keep pieces together when they are working on a project. Other tools include clamps. pliers. screwdrivers. measuring tape. pencils. saws. drills. wrenches.
Is it possible to refinish your own furniture?
Yes! There are many different ways to refinish older furniture without the need for professional help. Here are some ideas:
Use sandpaper on the surface to remove any stains or scratches. Then wipe down the surface with a clean cloth.
Use clear polyurethane varnish. Let dry completely before moving furniture around.
Use acrylic paint to paint furniture.
Instead of painting, use stain. The stain will give the furniture a rich look.
Use shellac wax. Applying wax will give the wood shine and protection.
Statistics
- In 2014, there were just over 237,000 jobs for all woodworkers, with other wood product manufacturing employing 23 percent; wood kitchen cabinets and countertop manufacturing employing 21 percent. (theartcareerproject.com)
- Most woodworkers agree that lumber moisture needs to be under 10% for building furniture. (woodandshop.com)
- Overall employment of woodworkers is projected to grow 8 percent from 2020 to 2030, about as fast as the average for all occupations. (bls.gov)
- Average lumber prices rose about 600 percent between April 2020 and May 2021. (familyhandyman.com)
External Links
How To
How to drive a nails in wood
The first step in driving a nail into wood is to choose the correct size and type of hammer. The most commonly used types of Hammers are claw hammers. Each type of hammer comes with its advantages and disadvantages. A claw hammer works well when you're trying to hit nails with a heavy hammer. However it is difficult to precisely control where the blow hits. The sledgehammer works well for large areas, but is too heavy for smaller tasks.
After selecting the right hammer, you will need to place your hand flat against one side of the head. The handle should rest comfortably in your hands. Take the handle and hold it with both hands. But don't press down so hard you injure yourself. Keep your wrist relaxed and the hammer straight up. Next, swing the hammer toward the ground and aim for the nail's center. You should feel the impact from the hammer striking a nail. If you're having trouble getting the hang of swinging a hammer, practice with a block of wood until you get the rhythm down.
Once you are ready to drive the nail, place the hammer close to your body. Position the nail, so it's perpendicular to the surface of the wood. Keep your attention on the tip. Move the hammer forward and then continue to move the hammerhead. Keep doing this until you are comfortable with the swing. Try adding power to your swings when you've mastered the technique. Then, raise the hammer from your shoulder to bring it down. This will allow you to exert more energy.
Once you have made the first hole, remove your hammer. The rest of the nails can be pulled out using a screwdriver, pry bar, or a hammer. Keep the nail heads parallel to the board's surfaces in order to avoid splitting wood.